|
Epic I for Mac provides real-time, multi-stream playback of DSLR quicktimes using the DVFilm Epic component, Final Cut Pro, and the Final Cut's RT Extreme feature.
|
|||||||||||||||||||||||||||||
| After you have installed and configured Epic I, open it by double clicking on the icon in the Applications folder. You can also access it by clicking on the Epic Column if you put it in the Dock. |  |
||||||||||||||||||||||||||||
 |
|||||||||||||||||||||||||||||
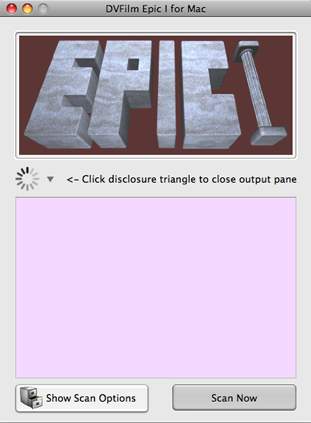
| The Epic Control Panel will open. Drag your DSLR folder into the Epic Control Panel. | |||||||||||||||||||||||||||||
 |
|||||||||||||||||||||||||||||
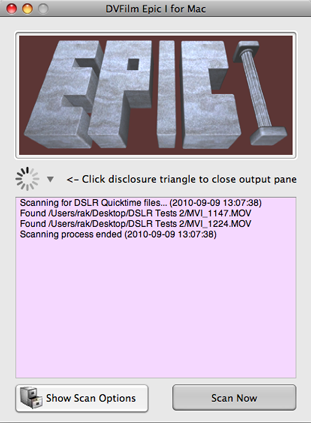
| Click "Scan Now" on the main panel to begin processing. If you click the disclosure triangle you can view Epic scanning the clips. | |||||||||||||||||||||||||||||
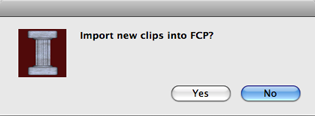 |
Once Epic is finished, it will open a window asking you if you want to import the clips into FCP. Click Yes to open import the clips into FCP. |
||||||||||||||||||||||||||||
 |
|||||||||||||||||||||||||||||
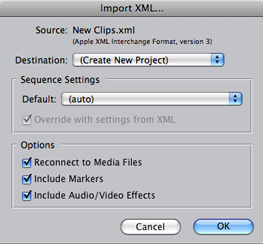
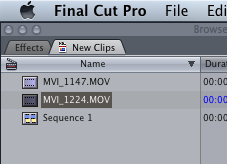
| If its not running already, FCP will start, and a window will open called "Import XML..." (at right). Be sure "Reconnect to Media Files" is selected and click OK. The clips will now assemble into a new bin called "New Clips" or they will import into your existing bin if you have one open. | |||||||||||||||||||||||||||||
 |
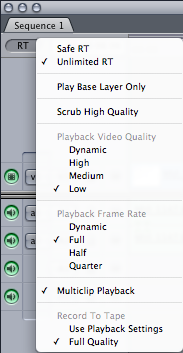 |
Open a new sequence using File->New->Sequence, then using the RT button on the FCP Sequence window, set up RT Extreme to the following settings as shown below: |
|||||||||||||||||||||||||||
|
Unlimited RT = Checked Playback Video Quality = Low - Checked Playback Frame Rate = Full - Checked Multiclip Playback = Checked Record to Tape = Full Quality - Checked All other options = Unchecked |
|||||||||||||||||||||||||||||
| TIP: Check Scrub High Quality to scrub through original frames. Unchecked allows real time scrubbing through RT Files. | |||||||||||||||||||||||||||||
 |
|||||||||||||||||||||||||||||
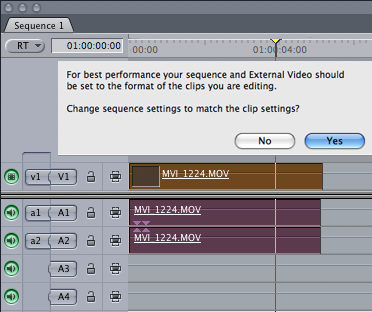
| Drag a clip to the sequence to begin editing. A FCP prompt will appear. Click Yes to match your sequence settings to your clip settings. | |||||||||||||||||||||||||||||
|
When you drag a clip into the sequence, the Epic Server bar (to left) will appear showing that Epic is preparing the Epic RT file which enables real-time playback. It is not necessary to wait for this progress bar to finish before editing. If you click on "Hide," the Epic Server will minimize to the Dock. It will also ask to clear the "RT process queue" which is the list of the clips the Epic Server is processing. If you click "Yes," it will clear the queue. Clicking "No" will hide the Epic Server, but Epic RT processing will continue in the background. |
|||||||||||||||||||||||||||||
| TIP: To have Epic Server process RT clips after the RT queue has been cleared, you must restart Final Cut Pro and Epic Server. | |||||||||||||||||||||||||||||
| Epic I adds clips to the Epic Server whenever you access a frame of a clip such as by dragging a clip to a sequence. Another method is to go to the Browser Large Icon view. This can be done by CTRL-clicking on the Browser window and selecting "View as Large Icons." Once in Large Icon View, all your clips will be added to the Epic Server to begin Epic RT processing. This is handy if you want to batch process all of you clips to Epic RT files at once.
TIP: Keep focus on the Epic Server bar to dedicate more system resources to processing Epic RT files. If you do not want all of your clips added to the Epic Server/RT Queue then be sure to set the Browser window to the "View as List" setting. |
|||||||||||||||||||||||||||||
| Epic processes clips for real-time playback in the order you drop them into the sequence. For the best workflow, you should drop 2 or more groups of shots into the sequence, then begin your rough cut on the first group. By the time you have roughed in those clips, they will be ready for real-time playback. By the time you have finished fine-cutting those clips, the rest of the clips will be ready for real-time playback. If, after you have assembled your rough cut, you do the fine-cutting from beginning to end of the sequence, there should be no waiting to get real-time playback. | |||||||||||||||||||||||||||||
 |
|||||||||||||||||||||||||||||
|
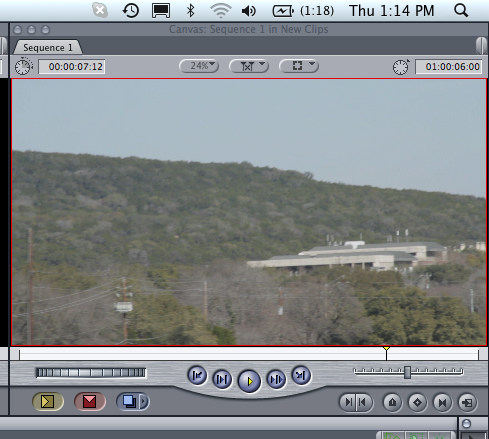
Once Epic finishes processing a clip, it will show a red frame around the clip in the Canvas. Playback and scrubbing will be be smooth when the red frame is showing. If you need to examine frames in full detail, for example to judge the fine focus of a shot, then switch the RT mode to "Scrub High Quality". To view the entire movie in full quality, real time, export the project in ProRes format and view using the Quicktime player. Exporting - Use File->Export->Quicktime Movie to export your edited movie. DO NOT use the "Same as Sequence" settings, but rather ProRes HQ or H.264 compression for most purposes. Epic will automatically disable the red frame and the RT mode when you export a sequence. There is no need to disable Epic or change the RT mode beforehand. |
|||||||||||||||||||||||||||||
| TIP: To view the entire movie in full quality real time, export the project in ProRes format, or some other suitable format and view using the Quicktime player. | |||||||||||||||||||||||||||||
|
Saving/Archiving your project If the path of your clips changes by moving or copying your project or renaming the folders, then the clips must be re-scanned by Epic for Mac. Do this by selecting the "Overwrite Clips" option in the Epic General Options tab, drag the renamed folder or the folder in its new location into Epic. Make sure it is the only folder selected, then click "Scan Now". Do not import the clips into FCP. Instead, open your new project in its new location. Help Final Cut Pro find the new location of your clips. Then save the project. |
|||||||||||||||||||||||||||||
|
|
|||||||||||||||||||||||||||||