1. Install and Configure Raylight Install Raylight if you have not already by unzipping the Release
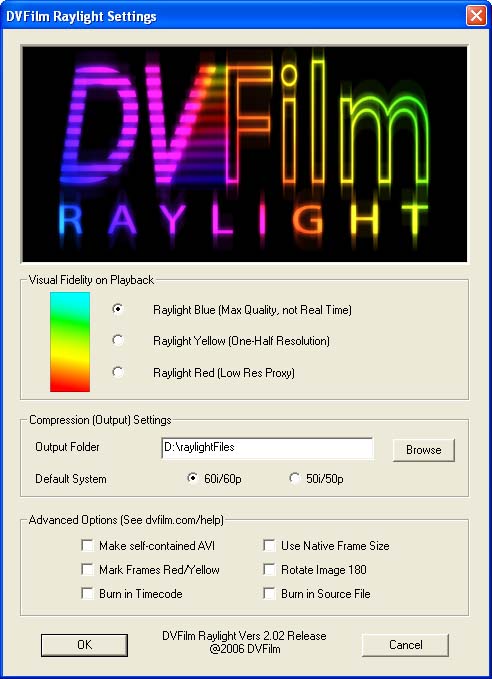
2.02 or later version download file and running Setup.exe as described in section 1. When Setup runs it registers the Raylight Vegas plug-in. Configure Raylight for Blue or Yellow quality mode and set the
output folder. Then at this point you need to decide to use either
square pixel HD format or the Native Frame Size HD format. The
square pixel format (the default) is recommended for new users
and has the best image quality. See the config screen below. Any of the Raylight options can be changed after editing has begun,
however the Frame Size option only takes effect when the MXF files
are imported into Vegas, or when Vegas is restarted. 2. Import MXF Files into Vegas Start Vegas, set the project settings as described in section 3, and then use File->Open, or File->Import->Media to locate the
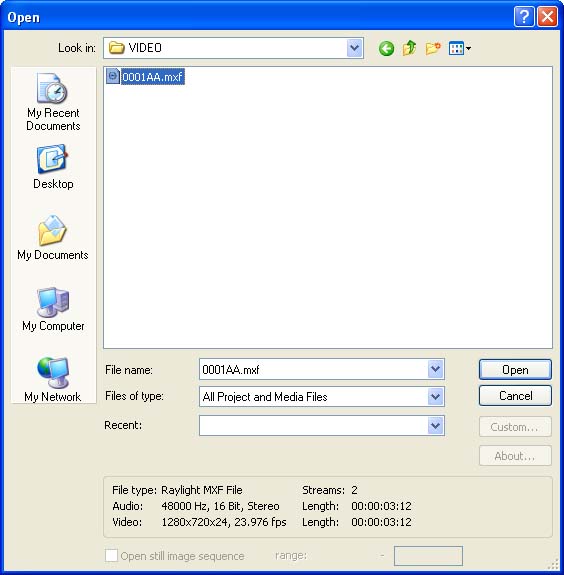
MXF files and import them into Vegas. If the Raylight plugin is
installed, when you click on an MXF file, the frame size, frame
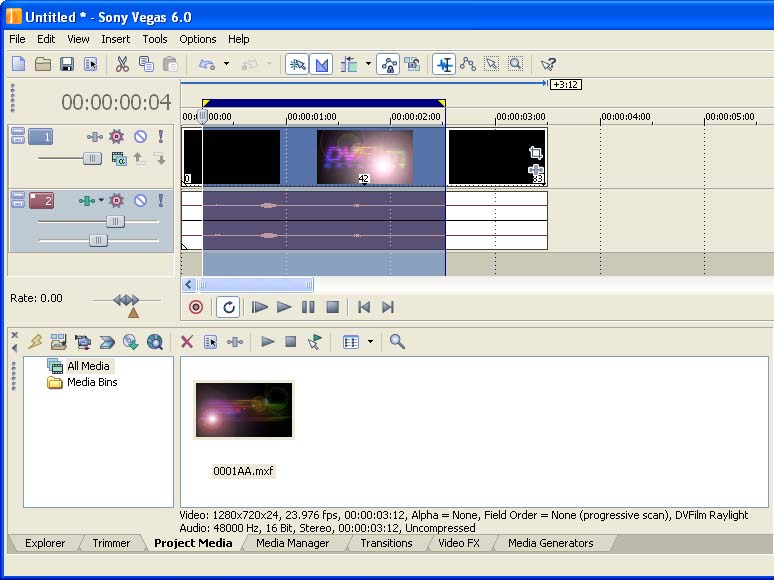
rate, and other information will be displayed as shown below: Raylight imports tracks 1 and 2 into a stereo track on the timeline. If you need access to tracks 3 and 4, convert them to WAV files
with RayMaker and import the WAV files separately. The MXF files may also be dragged directly from the desktop to
the timeline, or to the Media Bin. Presently the plug-in works
best with native frame rate formats like 720/24PN, 720/25PN, 720/30PN,
1080/30P and 1080i/25P. It can can also be used for 1080i60/24PA
and 720/24P with 2:3 pulldown. The latest release also works with
DVCPRO50 or DV, both PAL and NTSC and with 2:3:3:2 (advanced)
pulldown for NTSC. When the file is selected, its information is displayed as shown
below. The quality of the preview window can be controlled by the preview
window controls and by the Raylight Control Panel (see section 1 at bottom). Use the Vegas "Preview Auto" mode with the preview window set
to 1/2 or 1/4 actual size. Only the Raylight Blue and Raylight
Yellow quality levels apply to direct playback of MXF files. The
Red, or lo-res proxy mode, is not available since the proxy is
not created by the plugin. For this reason a dual-processor system
with fast disk drives is recommended for using the Raylight Vegas
plug-in. With such a system you can expect real-time playback
of 1080-line previews in Raylight Yellow, or real-time playback
of 720-line previews in Raylight Blue or Yellow. Real time playback
of effects and transitions can be accomplished by prerendering
them (use Tools->Selectively Prerender Video). 5. Exporting Video Exporting video (WM9, Uncompressed, MPEG2) from the timeline works
the same as described in section 3. Presently however you cannot export an MXF file or author a
P2 Card directly from the timeline. If you want to preview your
movie on the HVX200 camera, export a Raylight AVI and use P2 Maker.
The other options used by the MXF file plugin are
Also if the soundtrack MXF files are located in the adjacent AUDIO
folder, or in the same folder, the soundtrack settings will also
be displayed as shown at left.
3. Edit with MXF files on the Timeline
4. Playback from MXF Files