Shoot HDV at the normal 1080-60i or 1080-50i setting, or 1280 x 720 24P if you have the JVC-HD100. Do not use the Cineframe (CF24, CF25, CF30) modes on the Sony cameras, The 24F mode on the Canon XL-H1, A1, HV20 (24A mode) etc is acceptable.. See here for details and shutter settings for the FX1/Z1U. The footage can be easily converted to 24 Raylight AVI for editing at 24P using Sony Vegas or Adobe Premiere Pro. This is the highest quality method for a transfer to film or 24P digital projection. Click here to read about Raylight and purchase or download the free demo version. First capture your footage: 2. Capture MPEG2 Transport Stream Connect your HDV camera to the computer's firewire port. You must be running Windows XP. Download CapDVHS, a free program, by clicking here and unzip it. Run CapDVHS. Select your camera from the dropdown list (see below) and click on the Setting tab. Select the folder you wish to capture to by clicking Save Folder. Make sure it is a folder on your media drive (a drive dedicated to video data), and not the system drive. The Settings should be left at the defaults (see below). 3. Converting to 24P or 25P Raylight AVI The MPEG-2 captured clips must then be converted from 60i to 24P (or from 50i to 25P). For 24F clips, there is no frame rate conversion required, Maker ignores the 3:2 pulldown flags in the MPEG-2 stream. For 24A (HV20) the 2:3:3:2 pulldown remove must be used. To convert to Raylight run DVFilm Maker. If you purchased Raylight you can get a free download of Maker from dvfilm.com/update. Or if you do not own Raylight or Maker get the demo version of DVFilm Maker at dvfilm.com/maker. The frame size can also be 1920 x 1080, and the frame rate can also be 30 or 25. An options dialog will appear (see below) as well as a playback screen. (note that DVFilm Maker does not play back audio from the MPEG-2 playback screen). For 60i source material, click on the 24P Editing options and the 24P options screen will appear (see below). For 24F source material, select "Deinterlace" and then UNSELECT it (turn off all processing). For HV20 24A mode, use "Remove 2:3:3:2 pulldown" Click OK to close the dialog. Then click Advanced Options in the dialog above. All other options should be OFF. Click OK to close the dialog. Start the conversion by clicking Start on the main options dialog (see above right). At left see that the d:\raylight is being used as the output folder. If you use the default options, Raylight will create a .rayl file with the hi-res data, and a low-res proxy for editing will be stored in the AVI file. The .rayl file will end up in the d:\raylight\rayl folder in this example. If you use the Make self-contained AVI option, then no .rayl file is created. However you can not use the Raylight Red quality level in that case, which is the fastest level for playback. If your editing system has a dual disk stripe (RAID) system and fast dual core processors, you can safely choose the self-contained option. For all other options, see the Raylight ReadMe.txt file. 4, How long does it take? The conversion to 24P (or 25P) will take approximately 10 minutes for each minute of recorded video. When it is completed, click File, SaveAs on the main menu and choose an appropriate name for the Raylight AVI. Check the Raylight AVI in Windows Media Player and use the Raylight Control Panel to select Red, Yellow or Blue quality level. See the rest of the Raylight Tutorial on how to edit Raylight AVI and create an output file for transfer to film or video.
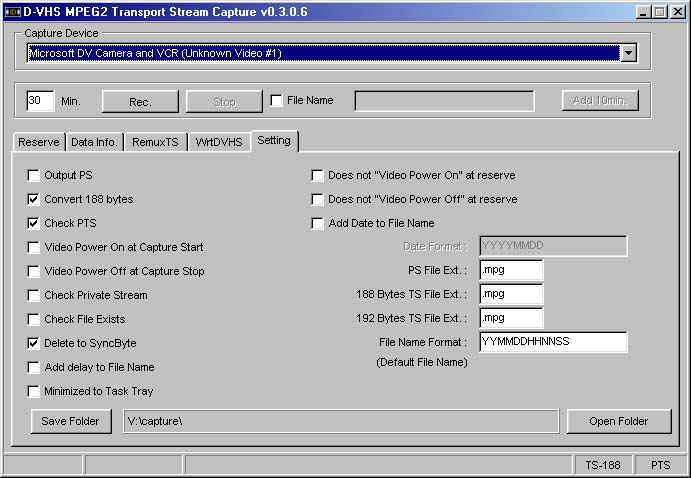
Click on Rec to get ready for capture, and then hit PLAY on your camera. When the take has ended, click Stop on the dialog above, then STOP on the camera.
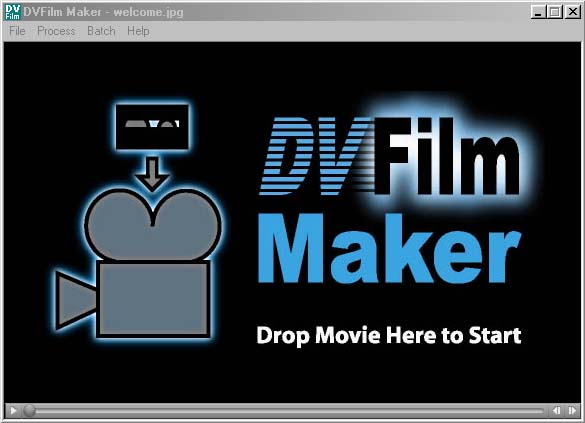
Start DVFilm Maker and the splash screen at left will appear. Drag the .mpg file you captured with CapDVHS into the screen.
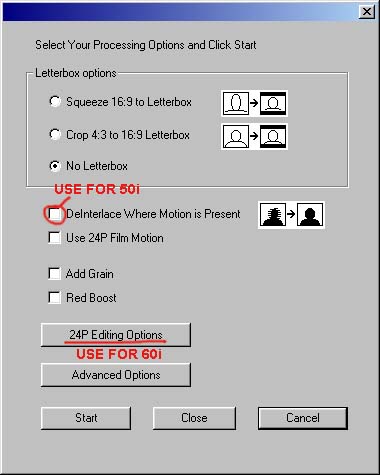
For 50i source material, select "Deinterlace..." to convert to 25P.
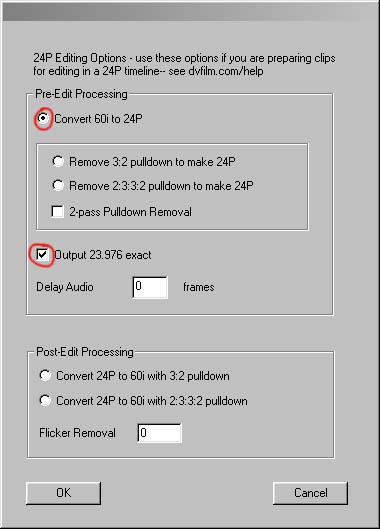
In the dialog at left, for 60i source material select Convert 60i to 24P and Output 23.976 exact
For all material, in the Advanced Options dialog, select User Selects Compression.
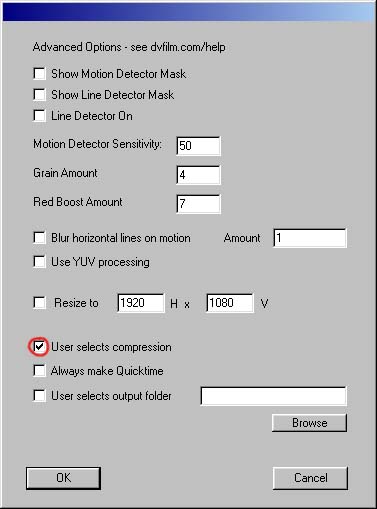
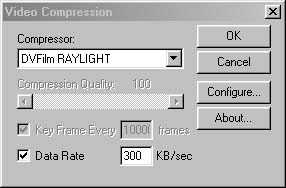
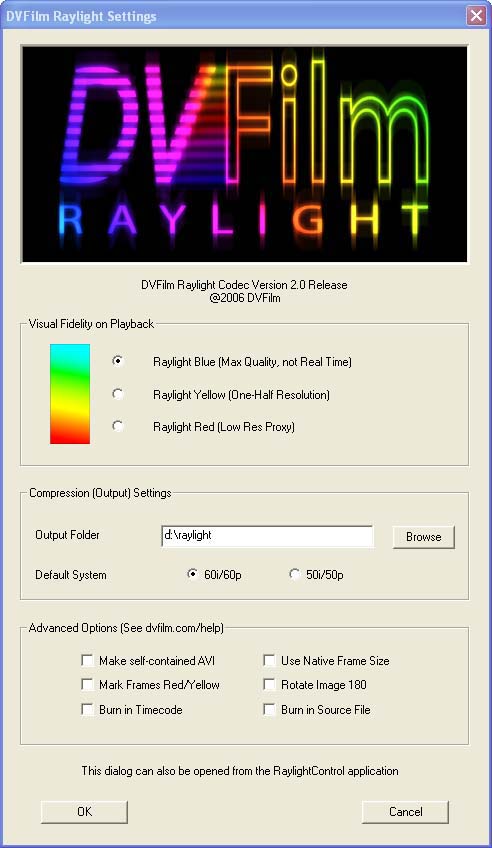
When you hit start, a compression select dialog will appear (see at left). Choose DVFilm Raylight as your compression format. Click Configure... if you have not already configured the Raylight output folder.
5. Checking the Raylight AVI