|
|
|
 |
|
|
|
Vegas Optimized Settings for Raylight Ultra
|
|
|
|
|
*
|
|
|
|
|
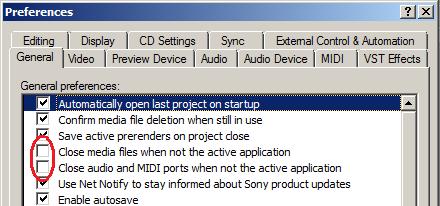
Set File Preferences in Vegas
These settings will improve performance when switching to/from the Vegas editing window (see at right).
In Vegas, click Options->Preferences and select the General tab. Unselect the two options highlighted in red.
|
|
|
|
|
 |
|
|
|
 |
|
|
 |
|
|
 |
|
 |
|
|
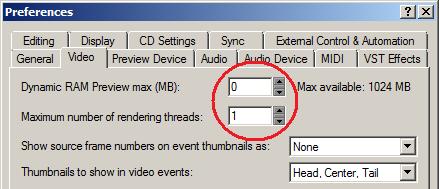 |
Set RAM Preferences
These settings will reduce the amount of memory used when scrubbing or rendering. The Dynamic RAM preview is not needed with Ultra and can interfere with switching between low and high quality modes. In Vegas, click Options->Preferences and select the Video tab. Set the Dynamic RAM Preview max to 0 (zero). Also most HD codecs are already multi-threaded so only one rendering thread is needed, this will also reduce memory use and improve performance. Set the Maximum number of rendering threads to 1 (one).
|
|
|
Click OK to save your preferences and restart Vegas so the settings can take effect. |
|
|
|
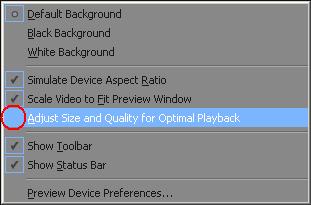
Switching between AVC-intra Proxies and Full Quality
Ultra will playback the proxies when you are in Preview Half in the Vegas Preview Monitor. To see the files at full quality, use Preview Full. Note that Vegas 9 will automatically switch to Preview Half when you attempt playback. If you want to turn off this behavior, right-click on the Preview monitor and unselect Adjust Size and Quality for Optimal Playback (see in red at right).
Enjoy Raylight Ultra! Contact DVFilm Support for more info. Also see our discussion board for more tips.
|
|
 |
|
|
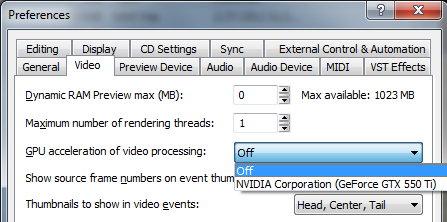
Vegas Pro 11 - GPU Acceleration and Ultra 10-bit YUV Mode |
|
|
|
 |
|
If you are using the GPU Acceleration feature in Vegas Pro 11, be sure to turn off the 10-bit YUV mode in the Raylight Control Panel and restart Vegas. There have been some reports of problems when both features are turned on.
If you would like to export in 10-bit YUV Mode, then switch the GPU Acceleration off (see left).
Enjoy Raylight Ultra! Contact DVFilm Support for more info. Also see our discussion board for more tips.
|
|
|
|
|
|
|
|
|
|
|
|
|
|
|
|
|
|
|
|
|
|
|
|